Apple Mouse Scroll Ball Clean and Repair
The Apple Mouse (Apple MB112LL/B) has a tendency to stop scrolling in one direction after a certain amount of use. This is typically due to the scroll ball mechanism becoming clogged with debris.
The following is a photo tutorial of how to clean and repair the scroll ball mechanism to bring your Apple Mouse back to full functionality. I have performed this exact repair on dozens of these devices with great success. You will only need a stiff blade, small Phillips screwdriver, cyanoacrylate (super glue), rubber bands and cleaning solvent (glass cleaner is adequate) to complete this repair.
Disclaimer: read the site’s terms of use before attempting to use any information you find here. This procedure probably voids your warranty too.
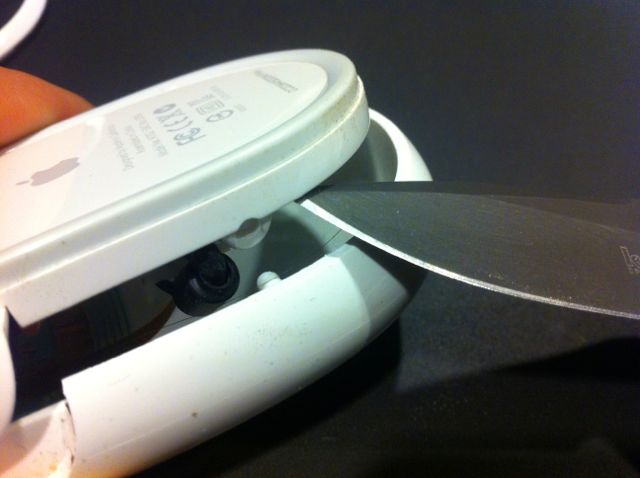
Carefully insert a stiff blade in the area shown, directly into the seam where the ring meets the body. Use the blade edge to split the ring away from the body, working it slowly and gently, breaking the glue bond section by section until the ring is no longer attached. Note that this step is probably the most difficult part of the repair, so take your time and be careful when working with a sharp blade.
If you break the ring, it is OK as you can glue it back together during the last step and will only be a cosmetic blemish.
Another common issue is the scroll ball not having any “spring” to it when depressed. The metal bar under the scroll ball is normally providing tension, but may have been bent flat from overuse. If your scroll ball is no longer “springy” use a small blade to bend the metal tension bar up and away from the grey base plate. That should help put more pressure on the scroll ball once the white clip is reassembled.
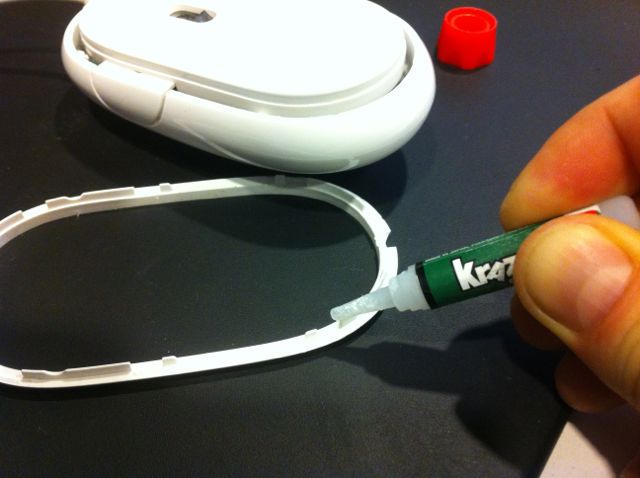
Next is the final gluing of the outer ring. Hopefully you have done a good job with cleaning and testing, because cyanoacrylate is a permanent adhesive. You only need to use 6 small drops of glue on each of the previous glue points. If you use too much glue, removing the ring for future repairs will be near impossible.
Congratulations, you just saved yourself about $50, or the cost of replacing the Apple Mouse.
The following is a photo tutorial of how to clean and repair the scroll ball mechanism to bring your Apple Mouse back to full functionality. I have performed this exact repair on dozens of these devices with great success. You will only need a stiff blade, small Phillips screwdriver, cyanoacrylate (super glue), rubber bands and cleaning solvent (glass cleaner is adequate) to complete this repair.
Disclaimer: read the site’s terms of use before attempting to use any information you find here. This procedure probably voids your warranty too.
1. Remove Outer Ring
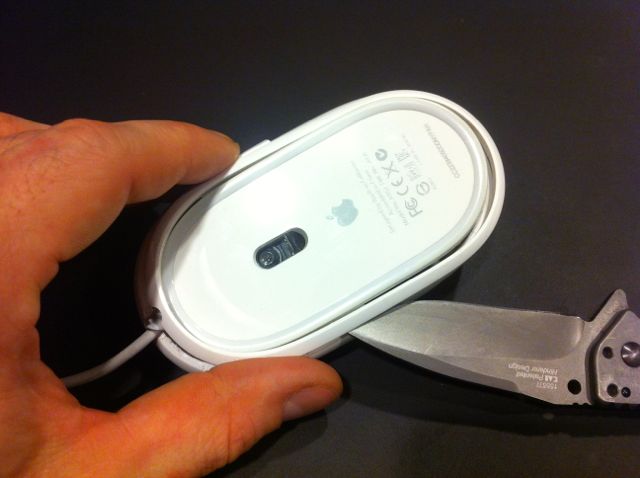
First start by turning the mouse over and locating the glued on outer ring. Note this is a white plastic ring, not the inner grey rubberized ring. To remove the white outer plastic ring, the glue bonds must be broken to free it from the outer mouse body. Since the plastic ring is thin and brittle, great care must be taken at this step.Carefully insert a stiff blade in the area shown, directly into the seam where the ring meets the body. Use the blade edge to split the ring away from the body, working it slowly and gently, breaking the glue bond section by section until the ring is no longer attached. Note that this step is probably the most difficult part of the repair, so take your time and be careful when working with a sharp blade.
If you break the ring, it is OK as you can glue it back together during the last step and will only be a cosmetic blemish.
2. Separate Body From Base
Next locate the hinge area, and pry the inner base away from the outer body. The peg and hole are visible in the image below. Since the outer body plastic is flexible, the prying motion is enough to pop out the peg from the hole, freeing the base.3. Clean Internal Surfaces
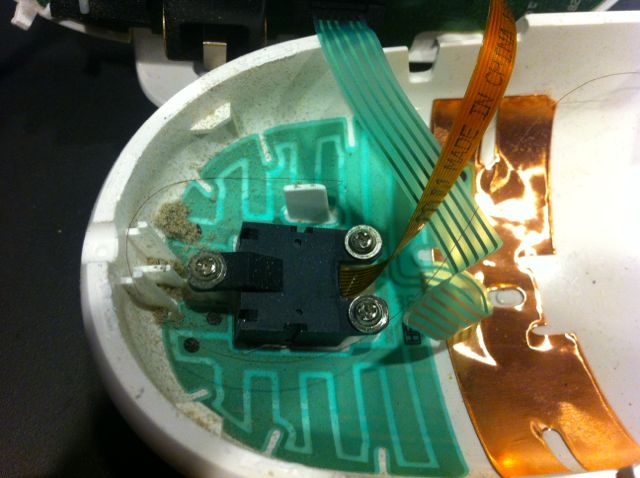
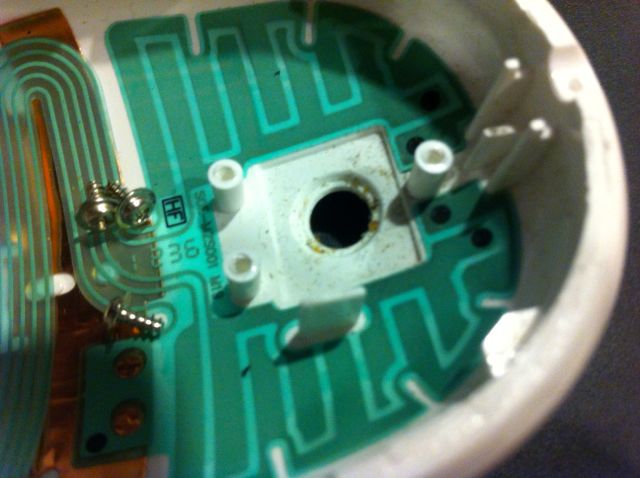
With the halves separated, the debris inside the mouse may be visible. In this particular mouse, we see a large amount of dead skin cells and some hair. Vacuum, wipe, blow or otherwise remove all foreign material from the interior cavities as this is the culprit that is jamming up the scroll ball mechanism.4. Disconnect Ribbon Cables
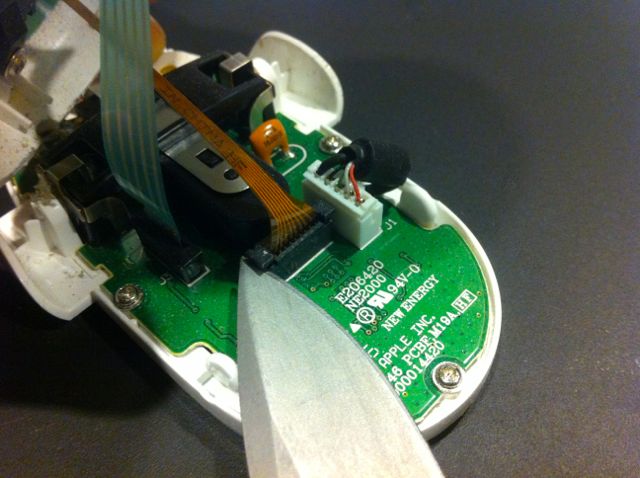
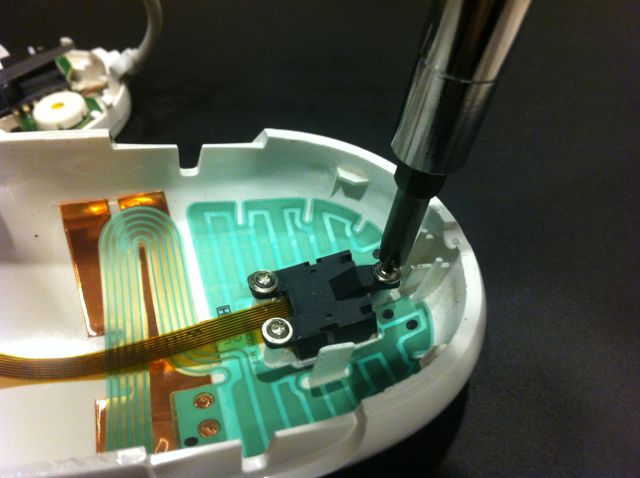
Next use a small blade to pry up the retaining tabs on the ribbon cable sockets. Be gentle with these and pry up both sides equally if possible. Once they are fully lifted up, the ribbon cable will come out of the socket quite easily.5. Unscrew Scroll Ball Mechanism Housing
Use the Phillips head screwdriver to remove the three screws retaining the scroll ball mechanism housing.6. Clean Scroll Ball Access Hole
Note any debris stuck between the scroll ball mechanism and the outer body, and clean them thoroughly.7. Disassemble Scroll Ball Mechanism
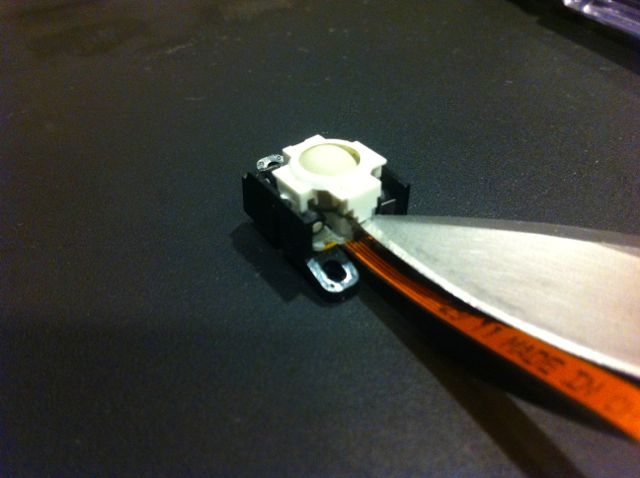
Release the white clip retaining the scroll ball by inserting a small blade under the tab like indicated in the photo below. The white clip is delicate and has several small posts on its interior side so be very gentle with it.8. Clean Scroll Ball, Clip and Rollers
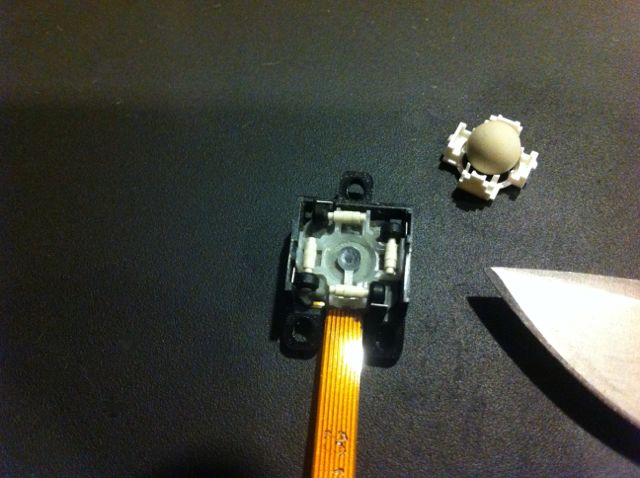
With the white clip and ball removed, we can see the four axis rollers, and the metal scroll ball tensioner bar. All of these parts are responsible for tracking scroll input and must be cleaned meticulously. Use any liquid cleaners safe for plastic, like glass cleaner, and be sure to get all the little nooks and crannies too. Take care not to get the black and grey plastic housing with ribbon cable wet, as it contains electronic components.Another common issue is the scroll ball not having any “spring” to it when depressed. The metal bar under the scroll ball is normally providing tension, but may have been bent flat from overuse. If your scroll ball is no longer “springy” use a small blade to bend the metal tension bar up and away from the grey base plate. That should help put more pressure on the scroll ball once the white clip is reassembled.
9. Reassemble and Test
Now reassemble the mouse by reversing the steps taken so far. Now is a good time to test the mouse to ensure your cleaning worked, and that you have remembered to connect the two internal ribbon cables securely.Next is the final gluing of the outer ring. Hopefully you have done a good job with cleaning and testing, because cyanoacrylate is a permanent adhesive. You only need to use 6 small drops of glue on each of the previous glue points. If you use too much glue, removing the ring for future repairs will be near impossible.
10. Glue and Dry
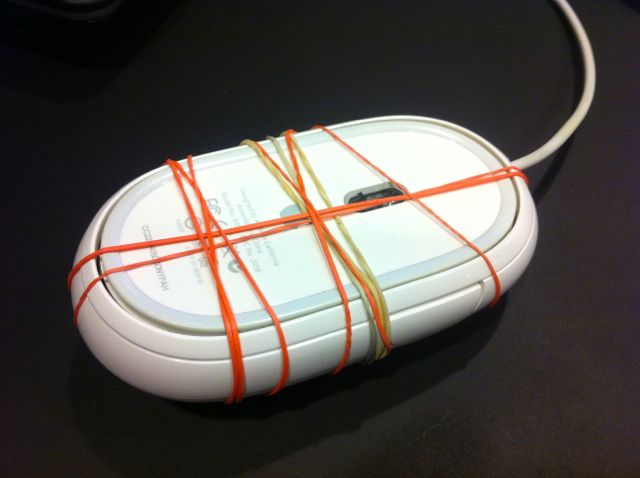
Use rubber bands to secure the outer ring onto the body and allow time for the glue to dry completely.Congratulations, you just saved yourself about $50, or the cost of replacing the Apple Mouse.